Digital pocket cards are the most useful items for documenting your stories on a traveler’s notebook layout. Today, I am going to show you 5 different ways to use these cards when creating a spread.
I used the My Tribe collection to complete this traveler’s notebook spread. It is one of my favorite collections, and I knew it would be perfect for documenting this photo of my family.
Here are the 5 ways pocket cards can be used on a traveler’s notebook layout:
1.As a frame
A frame can be created from almost any pocket card. Simply use a paper trimmer or scissors to cut out a window in the card. The photo can then be added behind it. This is a great way to draw attention to your photo.

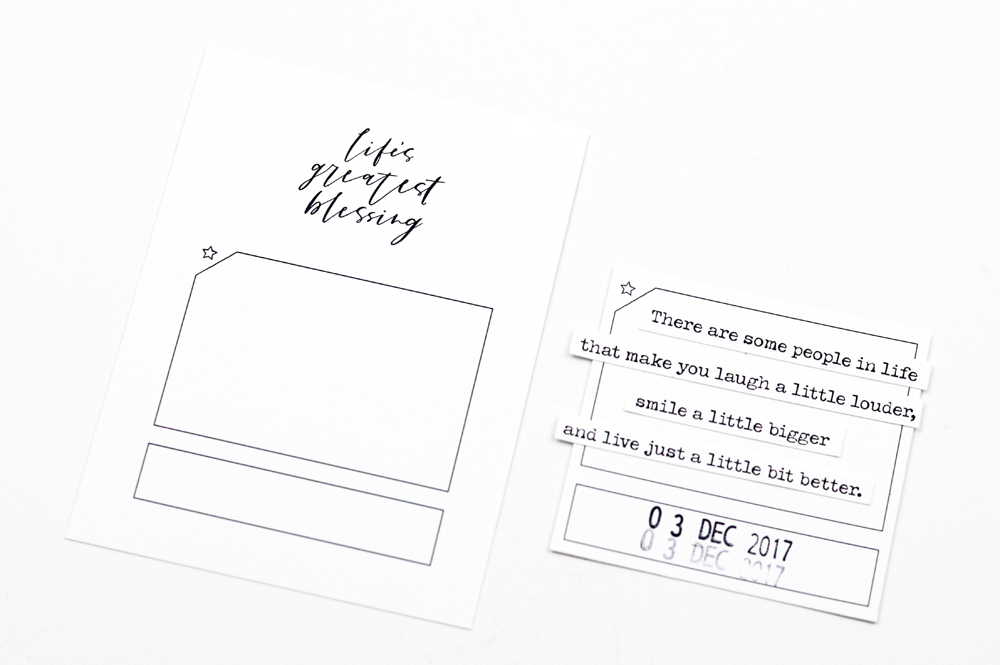
2. As a journaling spot
Look for an area on a pocket card that can be trimmed out to use as a spot for the journaling. This can either be a highlighted area on a card or a subtle pattern/light colored card. In the example, I used a pocket card with printed boxes and just cut out that section.
3. As layers
There are always pocket cards included in the set with some type of patterns or colors that are perfect for layering behind the photo, title or any other area on the layout you want to highlight. I used a floral card behind the photo on my page and punched a scalloped border out of a solid colored card. I love that the patterns on pocket cards are normally scaled down, making them perfect for using on traveler’s notebook layouts.

4. As a pocket and a tag
Pocket cards are also great for creating a pocket on the layout to slip a tag into. The pocket can be used to add journaling, an additional photo, or just as another area of interest on the page. I used a paper punch to cut out a half circle at the top of the card. This way you can easily see the tag peeking out. I used another card to create the tag by simply cutting the card to a smaller size, trimming the corners, and punching a hole at the top for the twine to be added.

5. As embellishments
A variety of embellishments can be created using pocket cards. In the example, I created a banner shape by cutting out a sentiment that was on one of the cards and trimming to that shape. Other shaped elements can also be created by using paper punches or simply trimming out a section of the card using scissors.

Here is the completed layout.

I hope I have given you some ideas for using pocket cards on traveler’s notebook layouts. These cards are such versatile elements and can be used in many different ways to create interesting and inspiring projects.
Once you have a chance to read the article I’d love to hear your thoughts on the topic in the comments section below.
Can you think of any other ways to use pocket cards on a layout?


 No products in the cart.
Thanks for the cutting the hole in the card for a photo. Hadn’t really thought of that before. One thing I can see doing is print some cards, cut them to fit the TN, choose two cards for the front and the back, cut all the others 1/4 inch smaller, hinge with cardstock or washi hinges the smaller card s to the covers, and put a magnet on the front and back closing edge. This could be a holder for pictures, journaling, or ephemera and fit into a journaling card pocket.
I really like all your ideas which could be incorporated into a digital page for those of us that don’t do hybrid. I’ve only used a few of your ides like journaling and turning the card into a tag. I’ll pin this post to remind me of the versatility of the cards. Thanks for sharing!
I’m glad I was able to give you some ideas. Thank you for commenting!
Thank you for the example, I forget I can cut up the cards to whatever I want. Thanks for the reminder.
Julie
Thank you, Julie! I’m happy to hear that this post was helpful.